Tag Archives: Chocolate

Chocolate Mousse Torte

Standard

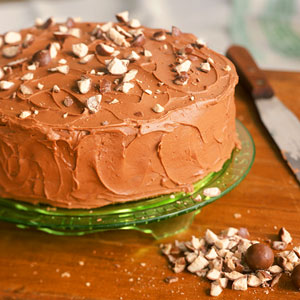
This is possibly my favorite Chocolate Mousse Tart and people just can’t seem to get enough of it. Decorated with melted chocolate and Chocolate Almond Pinecones make it delicious and beautiful!

Chocolate Mousse Torte

Total Time: Prep: 30 min. + freezing
Yield: 16 servings

Ingredients

1-1/4 cups chocolate wafer crumbs (about 25 wafers)
1/4 cup sugar
1/4 cup butter, melted

FILLING:
4 ounces bittersweet chocolate
1/2 cup plus 2 tablespoons milk chocolate chips
4 ounces white baking chocolate
1 tablespoon unflavored gelatin
1/4 cup water
5 egg yolks
1/4 cup sugar
1 cup half-and-half cream, warmed
1-3/4 cups heavy whipping cream
Semisweet chocolate chips, melted and Chocolate Almond Pinecones, optional

Directions

1. Combine the first three ingredients; press onto the bottom of a greased 9-in. springform pan. Bake at 375° for 8-10 minutes. Cool. Place each flavor of chocolate in a separate bowl; set aside. In another bowl, sprinkle gelatin over water; let stand for 1 minute or until softened.

2. In a small bowl, beat egg yolks on high speed for 3 minutes or until light and fluffy. Gradually add sugar, beating until thick and lemon-colored. Gradually whisk in half-and-half.

3. Transfer to a large saucepan; cook and stir over medium heat until a thermometer reads 160° and mixture has thickened, about 3 minutes.

4. Remove from the heat; stir in gelatin until dissolved. Immediately pour a third of the egg mixture over each flavor of chocolate; quickly stir each until melted. Cool for 10 minutes.

5. In a large bowl, beat whipping cream until stiff peaks form. Fold a third of the whipped cream into each bowl. Pour bittersweet chocolate mixture into prepared pan. Freeze until firm, about 15 minutes. Repeat with milk chocolate mixture, then white chocolate mixture.

6. To serve, carefully run a sharp a knife around edge of pan to loosen. Remove side of pan. Garnish if desired by drizzling with melted chocolate to create pine boughs and topping with chocolate Almond Pinecones.

Chocolate Almond Pinecones

Total Time: Prep: 25 min. + standing
Yield: 6 servings

Ingredients

1 tube (7 ounces) almond paste
4 ounces sliced almonds
1-1/4 cups semisweet chocolate chips
1 tablespoon shortening

Directions

1. Divide almond paste into six equal portions. Form each into a cone shape, about 1-1/2 in. tall and 1 in. in diameter. Beginning at the base, insert pointed end of almonds into paste to resemble a pinecone.

2. In a microwave-safe bowl, melt chocolate chips and shortening; stir until smooth. Insert a toothpick into bottom of each cone. Holding over bowl, spoon melted chocolate over almonds (if needed, use another toothpick to spread the chocolate to completely cover almonds). Place on a wire rack over waxed paper; let stand until firm.

German Chocolate Ring Recipe

Standard

This recipe is modeled after German Sweet Chocolate Cake, which is a favorite – and is a great sweet-tasting bread! It can be made ahead, too, and stored in the freezer for convenience.

German Chocolate Ring Recipe

Total Time: Prep: 30 min. + rising Bake: 20 min. + cooling
Yield: 20-24 servings

Ingredients

1-1/4 cups flaked coconut, divided
1 cup (6 ounces) semisweet chocolate chips, divided
3/4 cup chopped pecans
3 eggs
4-1/2 to 5 cups all-purpose flour
1/2 cup sugar
1 teaspoon salt
1 package (1/4 ounce) active dry yeast
1 cup milk
5 tablespoons butter, divided

Directions

1. In small bowl, combine 1 cup coconut, 3/4 cup chocolate chips, pecans and 1 egg; set aside. In large bowl, combine 1 cup flour, sugar, salt and yeast. In small saucepan, heat milk and 4 tablespoons butter to 120°-130°; add to flour mixture, beating until smooth. Add remaining eggs and enough remaining flour to form a soft dough.

2. Turn dough onto a lightly floured surface. Knead until smooth and elastic, about 6-8 minutes. Place in greased bowl, turning once to grease top. Cover; let rise in warm place until doubled, about 1 hour.
Punch dough down; turn onto lightly floured surface. Roll dough into 18-in. x 10-in. rectangle. Melt remaining butter and brush over dough; spread with reserved chocolate mixture.

3. Roll up dough jelly-roll style, starting with a long side; pinch seam to seal.

4. Place seam side down on greased baking sheet. Pinch ends together to form a ring.

5. With scissors, cut from outside edge to two-thirds of the way toward center of ring at 1-in. intervals. Separate strips slightly; twist to allow filling to show. Cover and let rise until doubled, about 1 hour.

6. Bake at 350° for 20-25 minutes or until golden brown. Sprinkle with remaining chocolate chips; let stand for 5 minutes. Spread melted chips; sprinkle with remaining coconut. Carefully remove from pan to a wire rack to cool.

Mexican Spiced Dark Chocolate Tarts

Standard

These easy little Mexican Spiced Dark Chocolate Tarts are one of my favorite new desserts to make! They literally come together in under 10 minutes and are sure to please a crowd. You can use dark chocolate, semisweet chocolate, milk chocolate or whatever you would like! Just whip up a simple ganache, spice it with some cinnamon, chili and cayenne, and then use it to fill these simple phyllo shells and top with whipped cream. Super simple, but so charming and decadent that your friends will think they are très gourmet. Enjoy!

Mexican Spiced Dark Chocolate Tarts

Prep Time: 10 minutes
Yield: 15 tarts

Ingredients

4 ounces dark chocolate, roughly chopped
1/3 cup heavy cream
1/4 tsp. ground cinnamon
1/8 tsp. chili powder
pinch of cayenne
15 mini phyllo (fillo) shells
whipped cream

Directions

1. Heat the dark chocolate and heavy cream together in a microwave or double boiler until melted, stirring occasionally. Stir in the cinnamon, chili powder and cayenne until combined.

2. Spoon about 1 teaspoon of the chocolate mixture into each mini phyllo cup. Refrigerate or serve immediately. Just before serving, use a piping bag or a spoon to top each phyllo cup with a dallop of whipped cream.

Dark Chocolate Truffle Cookies

Standard

Try Ghiradelli chocolate chips (that’s where the melty, gooey chocolate comes from), and actually let the mixture chill for an acceptable amount of time to ensure that the cookies are not flat.

Salted Dark Chocolate Truffle Cookies

YIELD: Makes 24-30
Cookies Prep Time: 4 Hours (Includes Fridge Time)
Cook Time: 10 mins

Ingredients

6 tablespoons unsalted butter
4 ounces bittersweet (mine was 60%) chocolate, chopped
2 cups dark chocolate chips
3 large eggs
3/4 cup granulated sugar
2 teaspoons vanilla extract
1/2 cup + 2 tablespoons all-purpose flour
2 tablespoons dark chocolate/dutch process cocoa powder
1/4 teaspoon salt
1/4 teaspoon baking powder
coarse sea salt for sprinkling
if desired: additional melted chocolate for dipping and chocolate sprinkles for coating

Directions

1. In a large bowl, melt butter, bittersweet chocolate and 1 cup of chocolate chips. I do this in the microwave, beginning with 30 second increments and stirring until totally melted. Set aside and let cool completely.

2. In a small bowl, combine flour, cocoa powder, salt and baking powder. Set aside.

3. In the bowl of your electric mixer, add sugar and eggs, beating on high until light and fluffy, about 2 minutes. Add in vanilla extract and melted chocolate/butter, beating for another 1-2 minutes until combined. Scrape down the sides of the bowl and the whisk or beater attachment, then remove it and stir in the dry ingredients with a large spatula until thoroughly dispersed by just combined. Fold in remaining chocolate chips. Cover with plastic wrap and place in the fridge for 4 hours (or even overnight!).

4. Preheat oven to 350 degrees F. Place parchment paper (or a silpat!) on an ungreased baking sheet. Wet your hands with water then begin to roll the dough into 1-inch balls, placing them about 2 inches apart. Do this quickly and if you are doing the cookies in batches, refrigerate the dough in between rounds. Sprinkle a bit of salt on top of each dough ball, then bake for 9-10 minutes.

4. Remove, sprinkle a tiny bit of salt again, and let cool for at least 10 minutes on the baking sheet. The should be completely cool before removing them! Once removed, place on wax or parchment paper to cool completely. Once totally cooled, if desired you can dip half of each cookie in melted chocolate then cover in sprinkles. These store pretty well but are fairly fragile.

Hazelnut Brown-Butter Brownies

Standard

Here’s an idea. Why not use nut flour to make gluten-free brownies?

hazelnut-brown-butter-brownies-recipe-fw0512-mdn

Yields: 20 large brownies
Total Time: 1 hr 30 min
Cook Time: 30 min

Ingredients

7 ounce(s) hazelnuts
1 cup(s) unsweetened cocoa powder
2 tablespoon(s) unsweetened cocoa powder
1 teaspoon(s) salt
3 cup(s) sugar
1 pound(s) (4 sticks) unsalted butter
12 ounce(s) bittersweet chocolate (70 percent), chopped
6 large eggs
1 tablespoon(s) tablespoon instant coffee, dissolved in 1 tablespoon of hot water

Directions

1. Preheat the oven to 325 degrees F. Line a 9- by 13-inch baking pan with foil, pressing it into the corners and leaving overhang on the 2 short sides.

2. Spread the hazelnuts in a pie plate and toast for 15 minutes, until fragrant and the skins blister; transfer to a kitchen towel to cool slightly, then rub off the skins. Let cool completely. Transfer the nuts to a food processor. Add the cocoa, salt, and 1/2 cup of the sugar and pulse until finely ground.

3. In a large saucepan, cook the butter over moderate heat, shaking the pan occasionally, until nutty-smelling and golden and the foam subsides, about 5 minutes. Remove from the heat and add the chopped chocolate; let stand until melted, about 2 minutes. Whisk the butter and chocolate until smooth, scraping up any browned butter solids from the bottom of the pan. Let cool slightly.

4. In a large bowl, using an electric mixer, beat the eggs with the remaining 2 1/2 cups of sugar and the coffee until tripled in volume, about 5 minutes. Beat in the chocolate-butter mixture. Add the cocoa-hazelnut mixture and beat to combine, scraping down the bowl. Scrape the batter into the prepared pan and bake for about 50 minutes, until the top is glossy and a toothpick inserted in the center comes out with a few moist crumbs attached. Let the brownie cool completely on a rack, then refrigerate until chilled.

5. Lift the brownie out of the pan and peel off the foil. Cut into 20 pieces and serve.

Malted-Milk Chocolate Cake

Standard

In this recipe, the frosting is made first, then part is reserved to ice the cake and the rest is used in the batter. To melt chocolate, place it in a small bowl or custard cup; microwave at HIGH 1 1/2 minutes or until soft, stirring until melted.

Malted Milk Chocolate Cake
Ingredients

Cooking spray
1 tablespoon all-purpose flour
2 tablespoons butter or stick margarine, softened
2 teaspoons vanilla extract
1 (8-ounce) block 1/3-less-fat cream cheese, chilled
5 cups powdered sugar (about 1 1/4 pounds)
3 tablespoons hot water
3 ounces unsweetened chocolate, melted
1/3 cup vegetable shortening
3 large eggs
1 3/4 cups all-purpose flour
1/2 cup malted-milk powder
2 1/2 teaspoons baking powder
1/2 teaspoon salt
2/3 cup fat-free milk
1/3 cup coarsely chopped malted-milk balls

Preparation

1. Preheat oven to 350°

2. Coat bottoms of 2 (9-inch) round cake pans with cooking spray (do not coat sides of pan); line bottoms with wax paper. Coat wax paper with cooking spray; dust with 1 tablespoon flour.

3. Combine butter, vanilla, and cream cheese in a large bowl; beat at medium-high speed of a mixer 2 minutes. Gradually add sugar, beating at low speed just until smooth. Add hot water; beat just until smooth. Add chocolate; beat just until smooth. Reserve 1 3/4 cups chocolate mixture for frosting; cover and chill 2 hours. Add shortening to remaining chocolate mixture in bowl. Beat at medium speed of a mixer until well-blended (about 1 minute). Add eggs, 1 at a time, beating well after each addition.

4. Lightly spoon 1 3/4 cups flour into dry measuring cups, level with a knife.
Combine 1 3/4 cups flour, milk powder, baking powder, and salt, stirring well with a whisk. Add the flour mixture to the egg mixture alternately with milk, beginning and ending with the flour mixture.

5. Pour batter into prepared pans. Sharply tap pans once on counter to remove air bubbles. Bake at 350° for 25 minutes or until a wooden pick inserted in center comes out clean. Cool in pans 10 minutes on a wire rack; remove from pans. Remove wax paper. Cool completely on wire rack.

6. Place 1 cake layer on a plate; spread with 1/2 cup frosting, and top with remaining cake layer. Spread remaining frosting over top and sides of cake; sprinkle top of cake with chopped malted-milk balls. Chill 1 hour. Store cake loosely covered in refrigerator.

Last Meal Of A Parisian Wanna Be

Standard

I knew it would finally arrive. My last day in Europe, specifically Paris, is here. It wasn’t hard to find my favorite parting food and the final meal of a francophile returning stateside. Chocolate!!

Charivari is a restaurant in Montparnasse that has the best chocolate ice cream ever. I don’t want the recipe, I just want to sit here at my sidewalk table at the corner of Montparnasse and Raspail Blvds., enjoy my ice cream and post a picture that will make you wish you were here… Bon appetit!!

IMG_20140917_194645

My Two Weeks In September

Standard

I usually take two weeks holiday each year and travel for my birthday. This year, London also made the cut (after Paris of course).

Ever hear that “London Bridge is falling down?” Psych! London Bridge is just fine, but it may have gone full tilt a few days in September due to a visit from two wild and crazy girls from the USA.

Funny story… we were enjoying some great burgers at a nice pub near the hotel. I got the check and used the currency conversion app on my phone to discover we had spent $82 on burgers and fries. The bill was £50.60. We are now planning to fast for the rest of the trip, lol!!

imageimageimageimagePhotoGrid_1410818695290imageIMG_20140916_162745782_HDRIMG_20140916_110831IMG_20140916_153925918

Lovely Alice has an admirer. Graham was sneaky and got a kiss in just as I snapped the camera!

IMG_20140916_084057487_HDR

Where Chocolate Goes To Live

Standard

I am forever amazed at the respect and lovely presentation given to food in random street shops in Europe. Here is another example of my chocolate being treated in a manner pleasing to any chocoholic. Pastries at a Paris sidewalk cafe…

IMG_20140909_065551340IMG_20140909_065531918

White Chocolate Cake with Orange Marmalade Filling

Standard

The filling for this cake calls for orange marmalade, but you can also use seedless raspberry or apricot jam. These would work well with the candied orange peel garnish. Edible flowers would also make a lovely decoration.

FW1104FTG10

Active: 25 mins
Total Time: 3 hrs
Servings: 12

Ingredients

2 1/4 cups all-purpose flour
2 1/2 teaspoons baking powder
1/4 teaspoon salt
1 1/2 sticks (6 ounces) unsalted butter, softened
1 1/2 cups sugar
4 large eggs
1 teaspoon pure vanilla extract
1 1/4 cups milk
8 ounces white chocolate, melted
2 tablespoons orange marmalade, very finely chopped if chunky
1/4 cup confectioners’ sugar
White Chocolate Buttercream
1/2 cup Candied Orange Peels, dipped in white chocolate, for garnish

Directions

1. Preheat the oven to 350°. Butter and flour two 9-inch round cake pans.

2. Sift the flour with the baking powder and salt. In a large bowl, using an electric mixer, beat the butter at low speed until smooth. Add the sugar and beat until fluffy. Add the eggs, 1 at a time, beating well after each addition. Add the vanilla. At low speed, alternately beat in the dry ingredients and the milk in 2 additions. Add the melted white chocolate and beat just until incorporated. Scrape the batter into the prepared cake pans and smooth the surfaces.

3. Bake the cakes in the center of the oven for 35 minutes, or until golden brown and a toothpick inserted into the centers comes out clean. Let the cakes cool in the pans for 10 minutes, then invert them onto a wire rack and let cool completely.

4. In a small bowl, using a handheld electric mixer, beat the orange marmalade and the confectioners’ sugar into 1 cup of the White Chocolate Buttercream. Set 1 cake layer on a cake plate, right side up, and spread the filling on top. Cover with the second cake layer. Frost the sides and top of the cake with the remaining White Chocolate Buttercream. Garnish with the white chocolate–dipped Candied Orange Peels and serve.